Running KOTOR on a Mac
Star Wars: Knights of the Old Republic is still among my favorite RPGs of all time. If you haven’t played the game yet, and you want to experience a classic Star Wars story, it’s about as good a time as any to jump in. For the guys over on Windows machines, things are super simple, but what about good old trusty macOS? Remember, back then, top-tier games like Neverwinter Nights, Fable, and also KOTOR, still saw physical releases on Mac.
Not only that, KOTOR, to this day, is still available as an actual app in the Mac App Store. When Apple dropped 32-bit support with the release of macOS Catalina, KOTOR got its well-deserved update to 64-bit. Unfortunately, that’s about the only thing Aspyr changed. Unlike KOTOR II, which supports modern controllers, high refresh rate monitors, and modern high-resolution displays, KOTOR supports none of that. Technically, you can run this game on any high refresh rate monitor, but at anything above 85Hz, the maximum refresh rate supported without hiccups, your characters will be unable to move after combat, forcing you to save and reload countless times.
In this guide, I’ll show you three distinct ways to install and play KOTOR on your Mac, and what pros and cons they come with.
macOS
As stated in the intro, KOTOR is available on macOS. You can just fire up Steam or the Mac App Store, buy the game, install it, and you’ll be able to play it.
Cap the frame rate at a maximum of 85 FPS, and you can play the game just fine—for the most part.
The elephant in the room is the resolution. First of all, your options are rather limited: for most people, 1280x1024 will be the maximum, with some people reporting resolutions of up to 1600x1200—the latter only being available if your host resolution is at least 1440p.
No matter how you look at it, that’s bad. The resolution itself is not great, and while most people could probably live with it, the far bigger issue is the aspect ratio.
Back in the early 2000s, when KOTOR originally came out, 4:3 was the golden standard.
Nowadays, we use 16:9, 16:10, 21:9, or even wider aspect ratios. Suffice to say, the offered resolutions look abysmal on modern monitors.
Installing the game
To get started, we need to get our hands on the game. While there are both physical and digital releases of KOTOR available for Mac, only digital versions are usable on modern Macs. Apple dropped 32-bit support in 2019, so the executables that shipped on the disc are no longer usable. For completion’s sake: If you have an older Mac lying around, running an OS that still supports 32-bit, you could go ahead and use the physical release just fine.
For the digital release, you can choose between Steam and the Mac App Store. There are resellers out there, and Aspyr themselves sold KOTOR for a while, but all of these boiled down to keys for Steam. I myself am using the Steam version of the game, so I’ll just download that.
Setting the correct language
With the game downloaded and installed, we could go ahead and launch the game, only to see that the game is in English, no matter what.
If we open up Steam, navigate to the game and open its properties, we can see that unlike other games, KOTOR on Mac does not support setting a different language.
To fix that, go ahead and install the game once more, this time on Windows, with your prefered language selected.
You can find instructions in this section of the article.
By the end of that process, you should have CrossOver installed, allowing you to run Windows programs on your Mac.
Follow the instructions to install the game in your desired language.
Once that's done, navigate to the root of your new install folder.
You should be greeted by several files and folders:
streamsounds, streamwaves, lips, and dialog.tlk.
Copy all of them, then navigate to the installation directory of the Mac version. In Steam, simply go to your library, right-click on KOTOR, select Properties, then click on Installed Files, then click on Browse.
If you followed these steps correctly, you should be greeted by an application inside a Finder window:
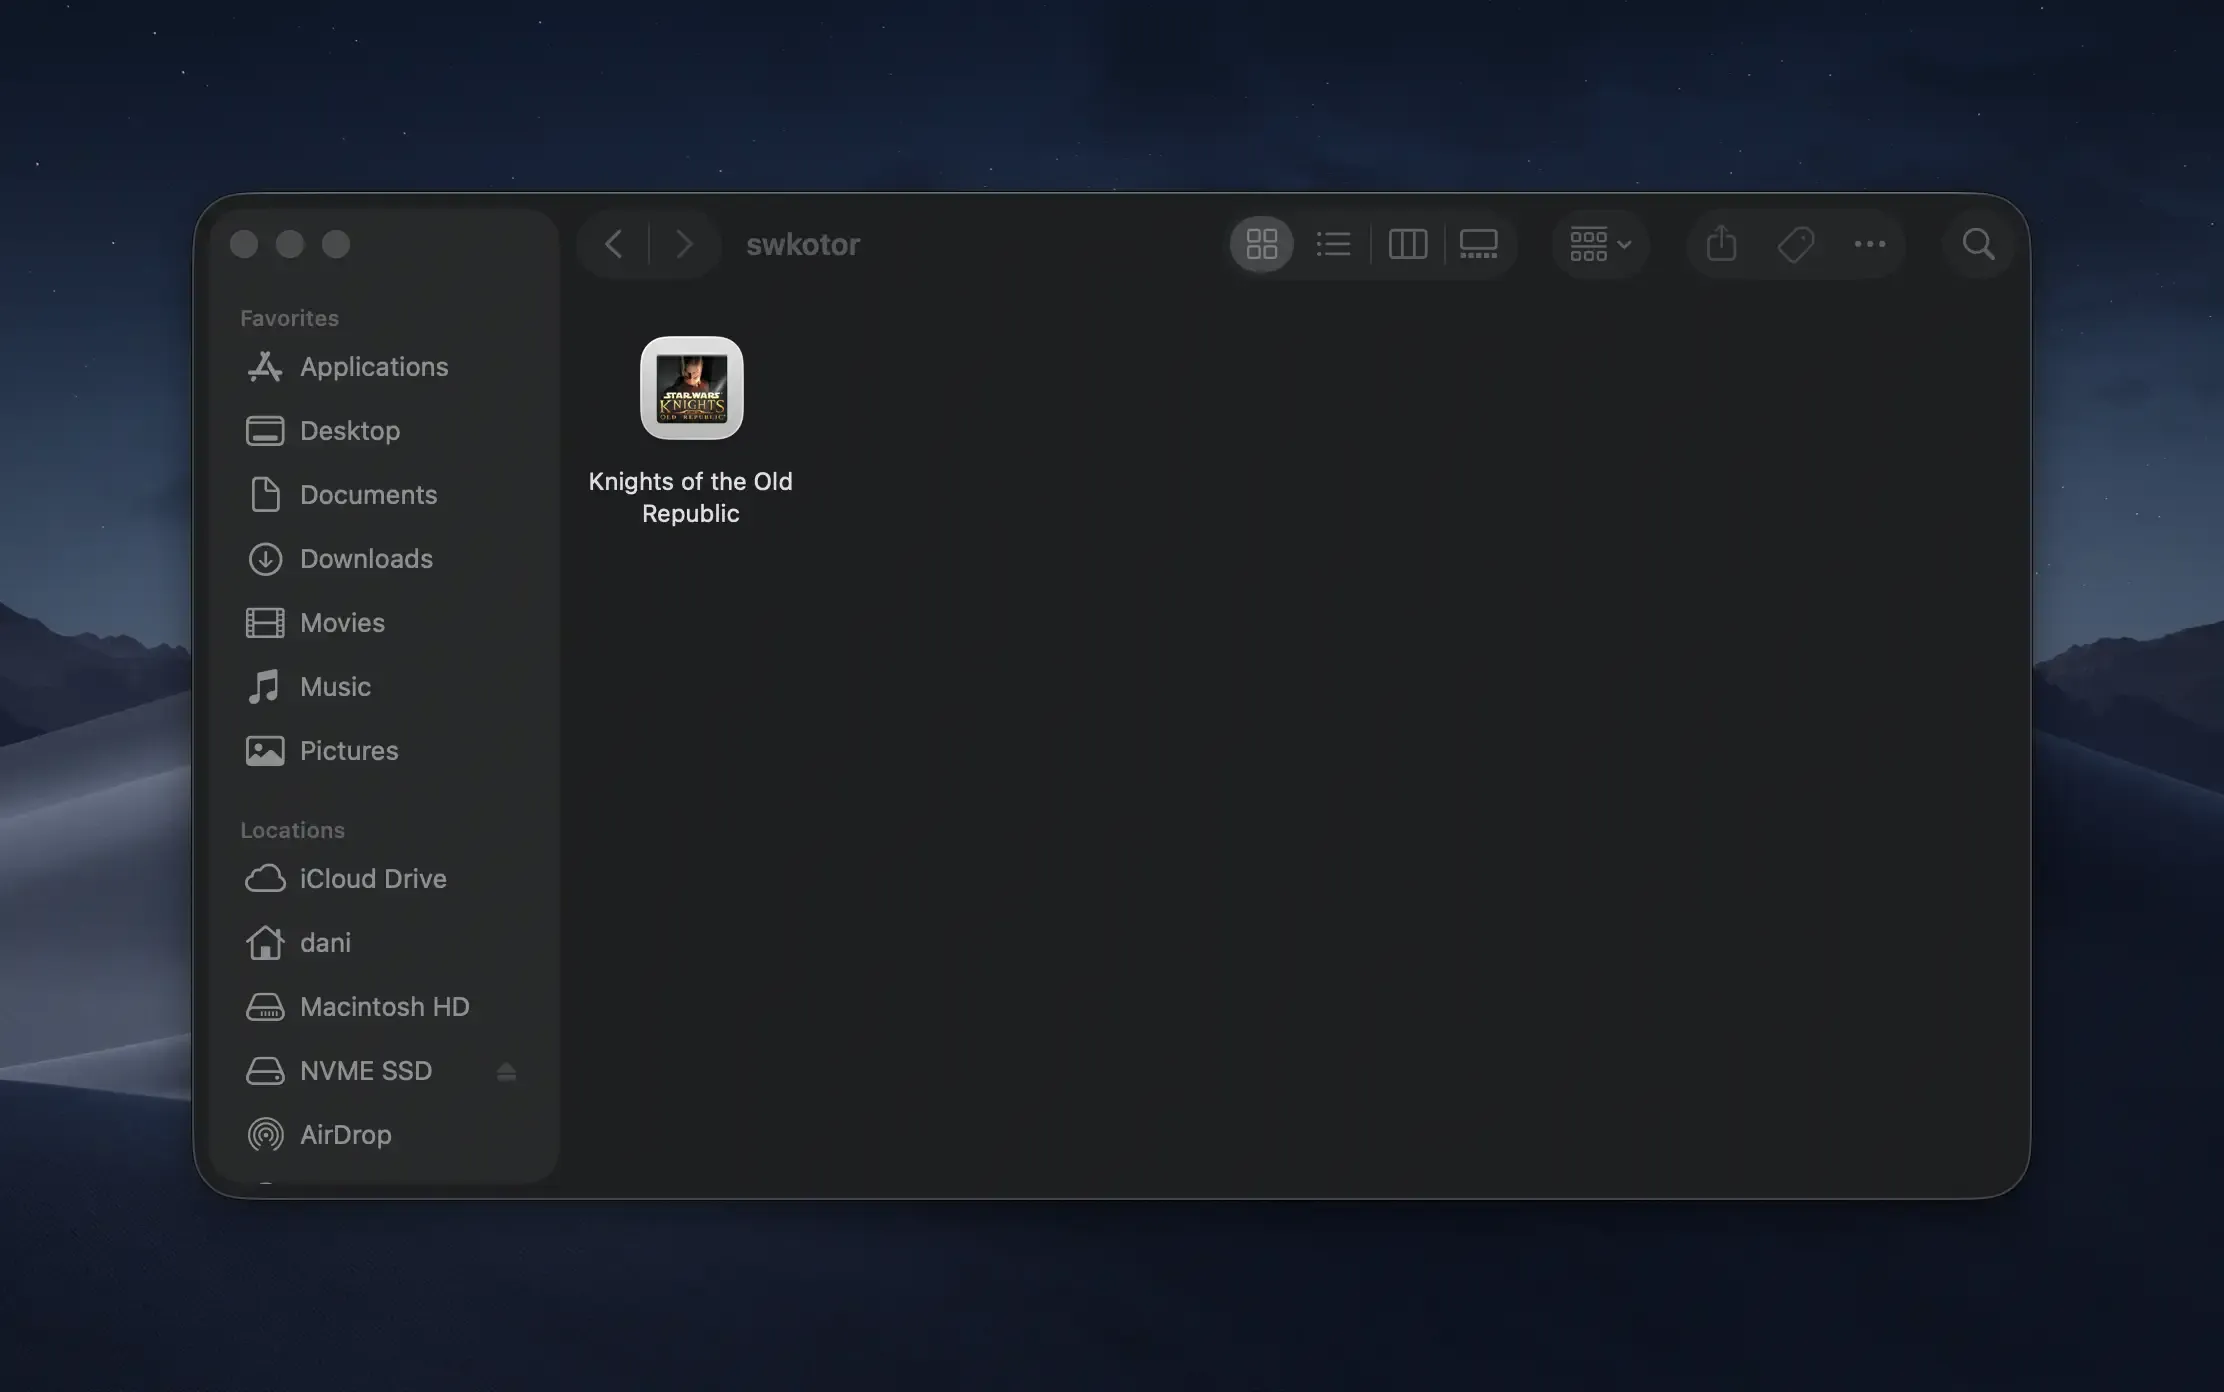
Simply right-click, then select Show Package Contents.
Now open the Contents folder, and head into Assets.
Once there, delete dialog.tlk, lips, streamsounds, and streamwaves.
Once that’s done, simply insert the files and folders you copied earlier, and you’re done!
You can launch the game, and you’ll be greeted by UI elements in the language you selected. Also, since we copied the audio files, voice-over for all characters will be in the correct language. Finally, we need to fix the resolution issue, as best as we can, at least.
Embracing 4:3
To play this game in a non-stretched resolution, you need to set your screen to 4:3. This is only really possible if you’re connected to an external monitor. macOS does not expose the relevant display resolutions out of the box, though, so we need to grab some piece of software first.
- Head over to BetterDisplay's repo, and download the latest release
- Find the
Releasessection on the right side, click on the latest version, scroll down a little, then download the.dmgfile - Once downloaded, double-click on it, and drag the
BetterDisplayapp into yourApplicationsfolder.
You can now launch the app. In your menu bar, you should now see this new icon right here:

Simply click on it, then click on Display Mode.
In this submenu, you now need to click on the Filter button, and then toggle 4:3 resolutions.
You can now see all the resolutions available that fit the 4:3 aspect ratio.
I selected 120Hz, but feel free to choose something different—given KOTOR’s internal 85 FPS limit, selecting something like 72Hz might be a good idea.
Once you select your desired resolution, you’ll now be greeted by some black bars on either side of the screen, and your screen real estate got visibly reduced to an almost square-like area—that’s what we wanted.
If we launch KOTOR again, we can now see that the game is no longer stretched. That’s how the game looked back in the day on our fat CRT monitors. It’s entirely up to you whether you prefer fullscreen stretched or proper scaling on 4:3 resolutions. Finally, we should talk about modding the game.
Modding the game
KOTOR has a very active modding community, and I remember modding the crap out of this game all the way back in 2006. While the good old days of Filefront/Gamefront are long since gone, there are thousands of mods available for KOTOR to download right now, and basically all of them can be used on your Mac as well. There are two types of mods, and both are rather easy to install.
For demonstration purposes, I chose Fens – Bastila, a fan-favorite retexture of Bastila.
This mod is special, because in most cases, it’s trivial to install, but under certain circumstances, we need to cover both installation options, so you can see both in action.
To grab the mod yourself, just follow the link to the mod, click on the Files tab, then download whichever version you prefer—I went with Fen's — Bastila Corrupted.
Once downloaded, you’ll end up with an archive. Simply unarchive it using either the default Unarchiver or use something more sophisticated like Keka, my personal favorite—not an advertisement, I’ve been using it for several years now, so I may as well give it a shoutout.
Once done, you’ll end up with a folder, containing all files and folders needed to install the mod.
Most mods come with a readme that explains how to install them.
In our case, we simply go into the Fens - Bastila Corrupted folder, copy everything inside the Override folder, and move it into our game’s own Override folder.
If you just installed the game, it won’t come with said folder yet, so we need to create it manually.
Follow the steps outlined above to find your KOTOR installation.
- Right-click on the KOTOR app
- Click on
Show Package Contents - Navigate to
Contents->Assets - Create a new folder called
Override
Finally, just drop the files into your newly created Override folder.
Next, we copy the contents of the Modules folder and copy those into our game’s Modules folder.
Finally, there is another folder called Existing2DAPatch.
KOTOR makes use of .2da files, which are similar to an Excel spreadsheet, or a local database.
If you already have mods installed that affect either the heads.2da or portraits.2da files, you must use the included TSL patcher—TSL being an acronym for “The Sith Lords”, the subtitle of KOTOR II.
Since it’s a Windows executable, we need access to Windows in one way or another. Depending on whether you chose to extract the correct language files yourself or you chose the ones I provided, you may already have CrossOver installed. If not, follow the instructions right here.
I chose CrossOver for ease of access, but other options include virtual machines like Parallels, VMWare, or UTM, or other apps like Porting Kit, which is a free alternative to CrossOver. Follow the steps outlined below to run the patcher correctly.

Create a backup
You should always create a backup of your current installation before applying one of these patches. Things may go wrong, and depending on how excessively you modded your game, returning to the previous state may take a while if you haven’t got a backup.
- Open CrossOver and choose any Windows 10 bottle. If you haven’t created one yet, refer to this section
- Click on the
Run Commandbutton - Next to
Command, click onBrowseand point it to theTSLPatcher.exeinside the mod folder, then click onOpen - Click
Run; the Windows executable will be launched - Depending on the mod, you may need to click on the
🔍icon in the bottom right, toggling the mod’s config summary - Click on
Start patching, then confirm withYes - You are prompted to point it to your
heads.2dafile. This file resides in yourOverridefolder, so navigate there, then select it - Repeat the same process for the
portraits.2dafile - Let the patcher do its thing, click
Ok, thenExit
What we just did has no effect, given that no other mod has affected those .2da files, but you learned how to use those patchers.
Lots of mods use these patchers; some simply move some files into your Override folder, and you can get away with just manually moving all the files from the tslpatchdata folder into your Override folder—like the one we used in this example—but others do more than that.
So what did the patcher do? Why can’t we just move the files from tslpatchdata into our Override folder manually?
It merged our existing .2da files with the changes introduced by the mod.
And that’s it. Some mods include well-documented installation instructions, while others are severely lacking in that department. The large majority of mods works perfectly fine out of the box, but as always, when it comes to modding, be prepared to troubleshoot.
If you enjoy that nostalgic feeling of lower resolutions and long-forgotten aspect ratios, this is the way to play the game on a Mac. If you fancy a more modern experience, check out one of the other options.
Switch Emulation
If you followed my tutorial for installing and setting up the native version of KOTOR on macOS and decided that you need a more modern experience, Switch emulation may very well be an option for you. The Switch version offers controller support and widescreen resolutions out of the box. However, unlike the other versions, it lacks official mod support, so modding is basically out of the question.
As of writing this article, there are several Switch emulators available on Mac, but Astris, a Mac-exclusive Switch emulator that comes with a beautiful interface built in SwiftUI, is currently the most performant and most recent emulator on the market.
Installing an emulator
Just follow the link above, and grab the latest release from GitHub. If you need a little extra help, I already showed you how to download releases from GitHub earlier, when we downloaded BetterDisplay.
Once that’s done, you’ll end up with a .dmg file—simply mount it by double-clicking on it, and drag the Astris icon onto your Applications folder.
Next, simply try to launch the app. You’ll be greeted by this warning here:
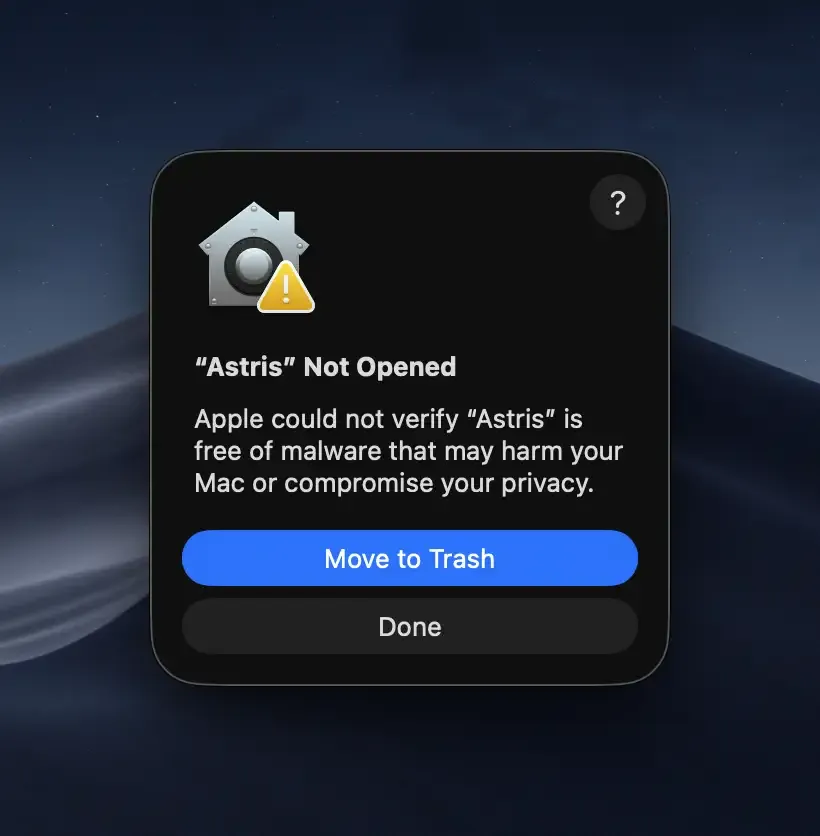
Simply open your System Preferences, scroll down to Privacy & Security, then scroll all the way down, and click on Open Anyway next to "Astris" was blocked to protect your Mac.
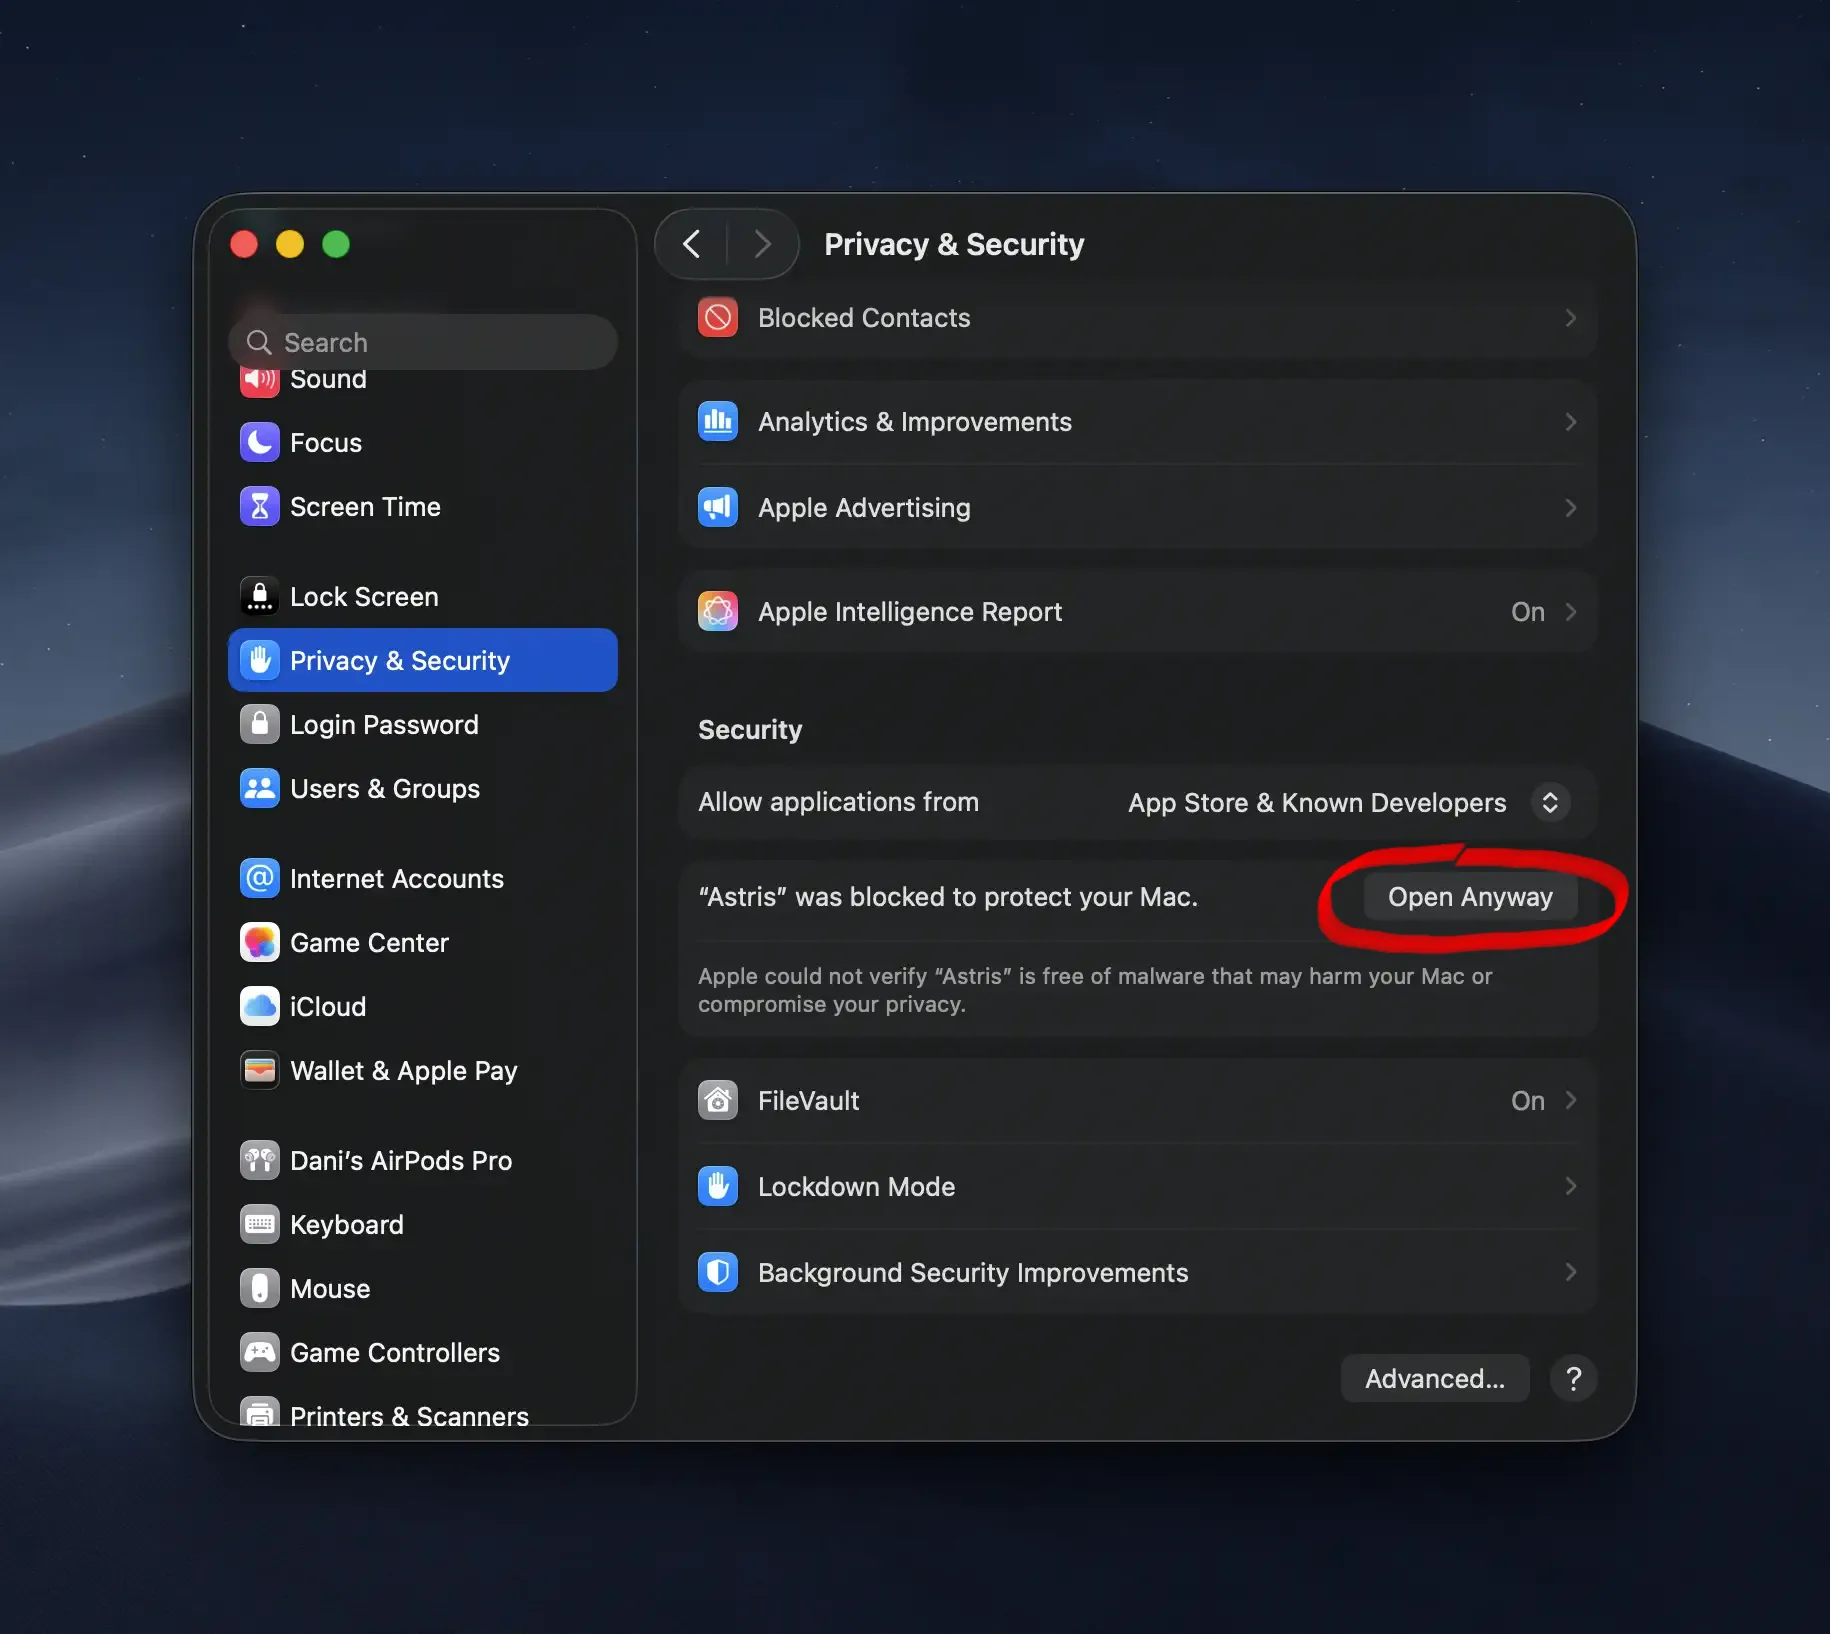
Click on Open Anyway in the dialog that opens up, enter your password when prompted, and you’re good to go.
Next up, you’ll be greeted by Astris’s welcome screen, asking you to point it to your data directory.
If you want to continue using data created by Ryujinx, one of the other emulators available on macOS, you can do so by pointing it to Ryujinx’s data directory.
It will automatically locate it, as long as you used the default directory.
If you haven’t used Ryujinx before, no problem either, just point it to somewhere else, wherever you feel comfortable.
I would still recommend you to point it to where Ryujinx would save your config at, simply to make your setup more versatile.
The default path for that folder is
~/Library/Application Support/Ryujinx
If you don’t bring an existing data folder, you’ll then be asked for production keys.
You can just follow this link, and you’ll find a website where you can grab not only the production keys but also the title keys, which we will need for actually running games.
Simply download both keys, then point Astris to the location of your keys.
Ideally, you would move both the prod.keys, as well as the title.keys file into your Ryujinx’s system folder.
After you provided the production keys, Astris needs a firmware file. You can always grab the latest firmware from here, but keep in mind that the keys are tied to a specific firmware, so if the firmware version is newer than your keys, they won’t work. Astris will tell you if you try to install a firmware that would lead to a version mismatch with your keys.
Setting up the game
Now that that’s done, we can focus on getting KOTOR ready. You need to get a hold of the game itself, and its 1.0.4 update. You may search this via Google to find a place to get both. Once you got those, extract the game and the update to a place where you can find them. In my case, I have dedicated folders on my external drive—one for all my games/ROMs, and one specifically for Switch extras, such as updates, DLC, and mods.
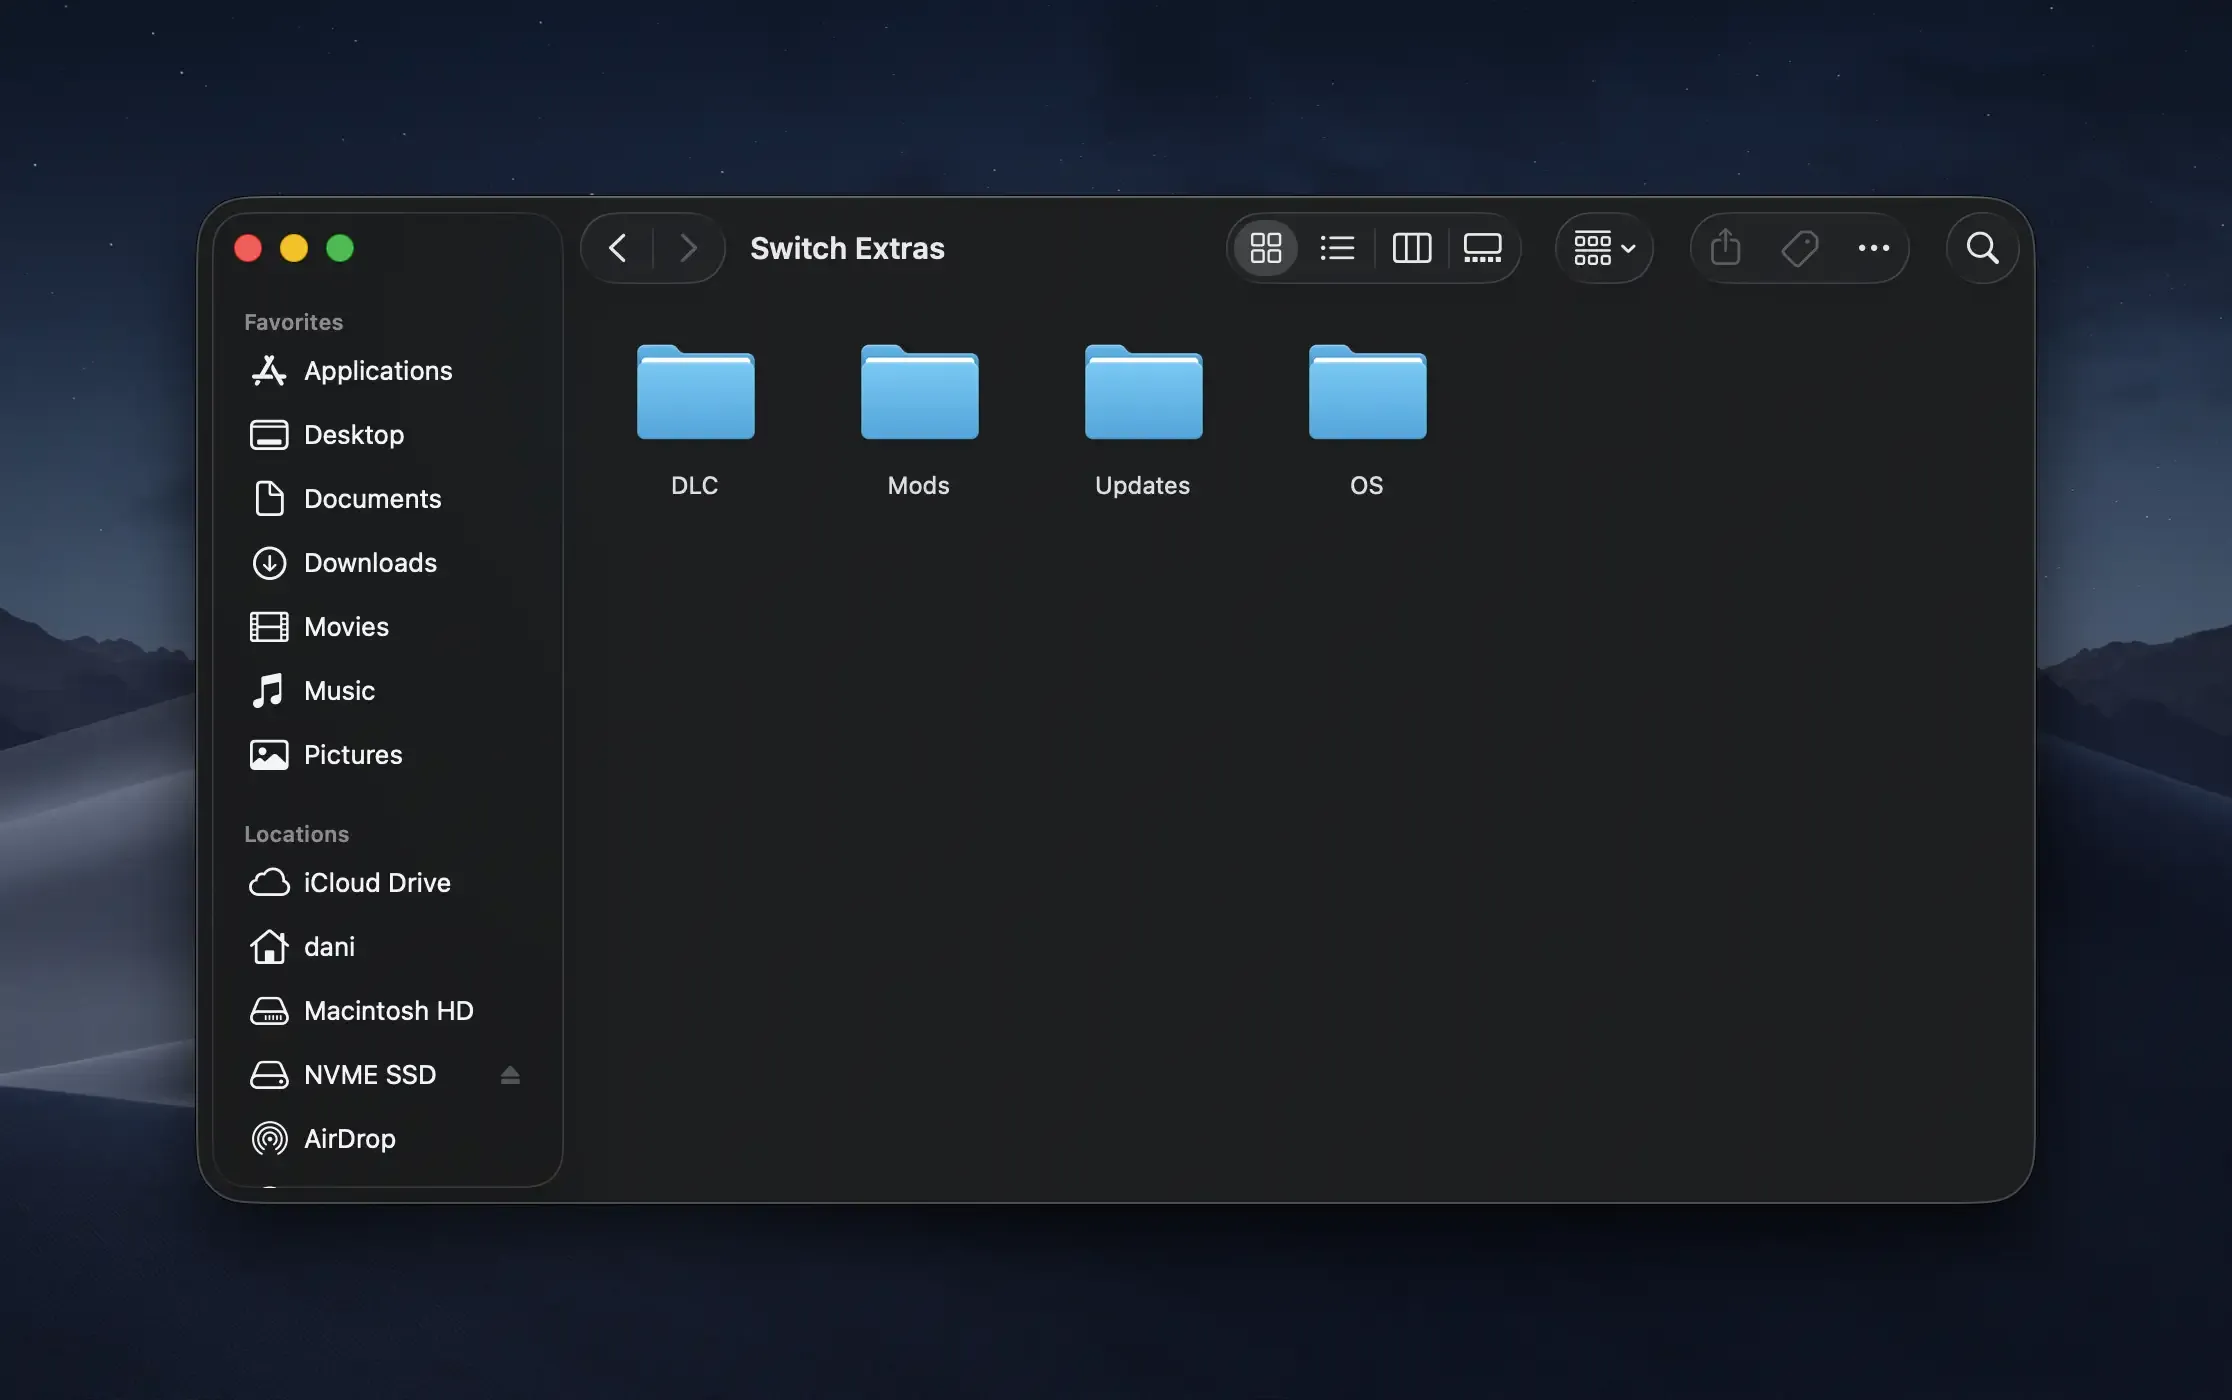
Next, go to Astris, open its settings, then under General, add a new game library by clicking the button labeled Add game folder....
Simply point it to where your game is stored.
Your game should now appear in Astris’s library.
Once that’s done, right-click on the game, and select Manage Updates, then click Add, and point it to your KOTOR update file.
Once that’s done, you should see the version jump to 1.0.4.
Alternatively, you can just add the folder containing your updates, DLC, and so on as a game folder. That way, Astris will pick up game updates and DLCs automatically, and you no longer need to manually point each game to its dedicated update files or DLC.
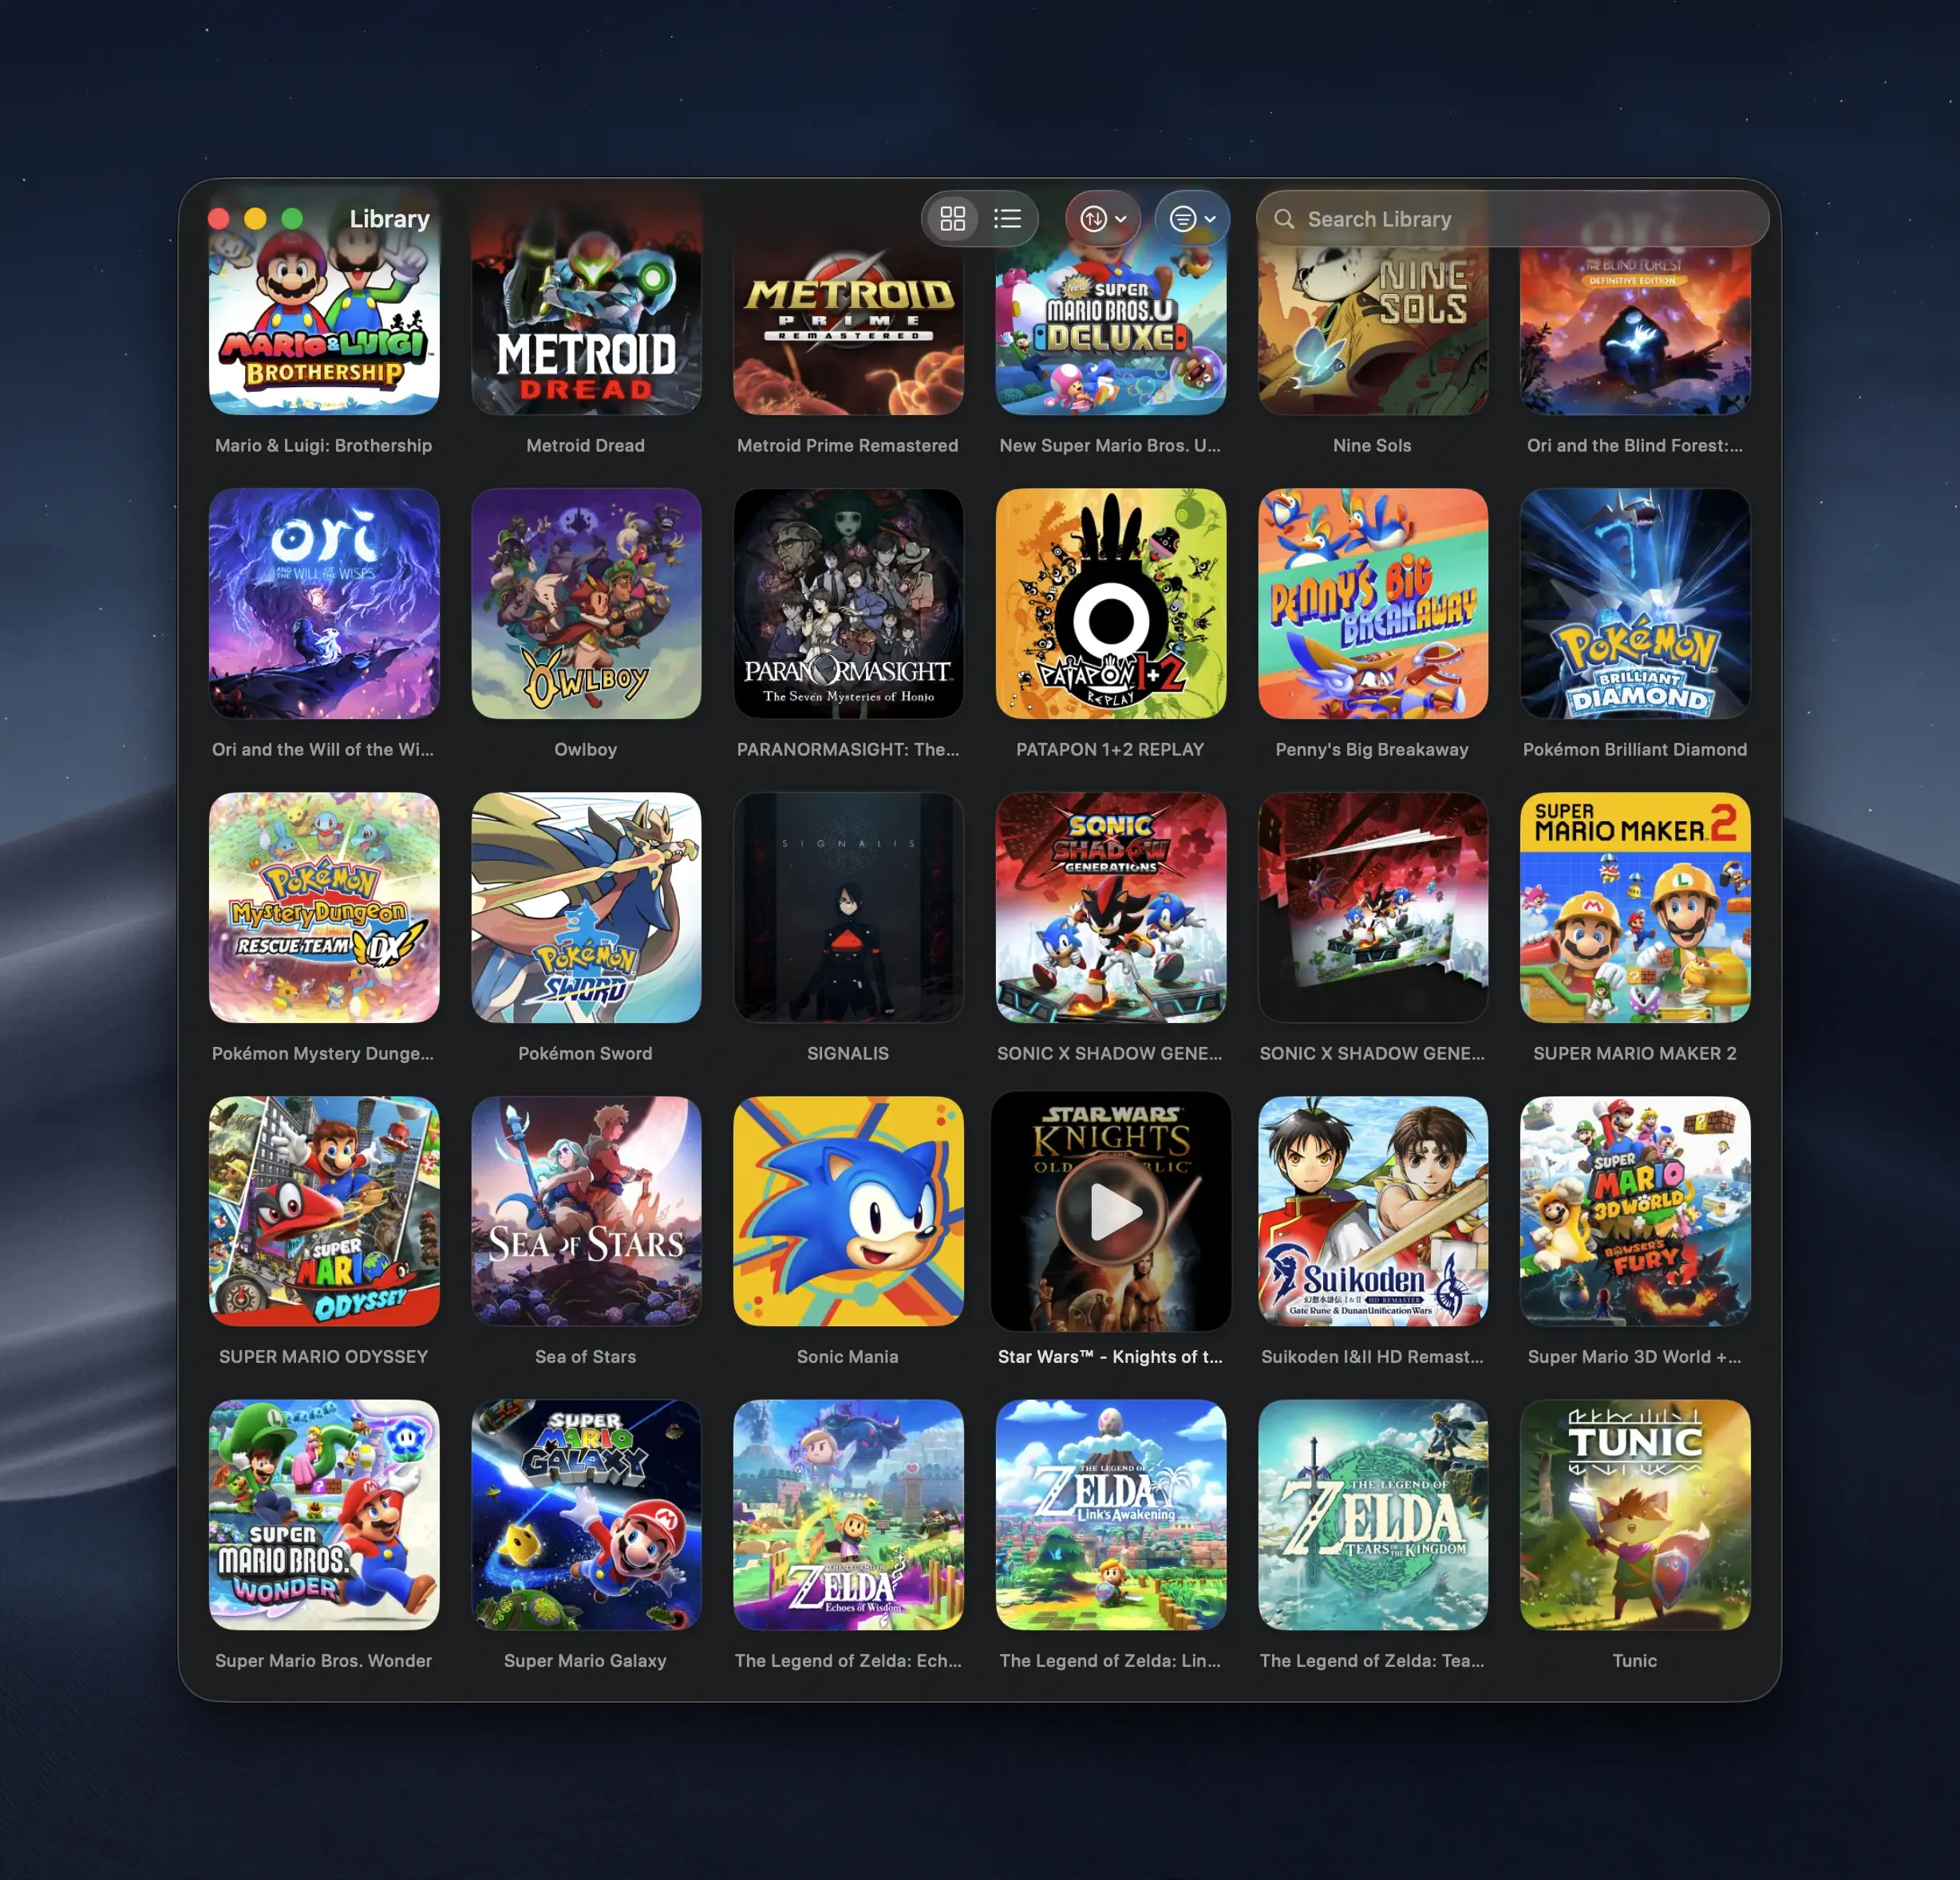
Finally, we need to set up our controller.
This is probably the biggest difference between the Switch version and all other versions—it has native controller support.
You could, in theory, work around that issue via Steam Controller support and dabbling around in there, but it’s not the same.
Simply open up Astris, go into your settings, and then Input. Make sure your controller is connected, then click on the dropdown next to one of the list items here, then select Controller.
Now you need to point it to your controller, and choose if you want to use it as a pair of JoyCons or a Pro controller—I usually go with the latter.
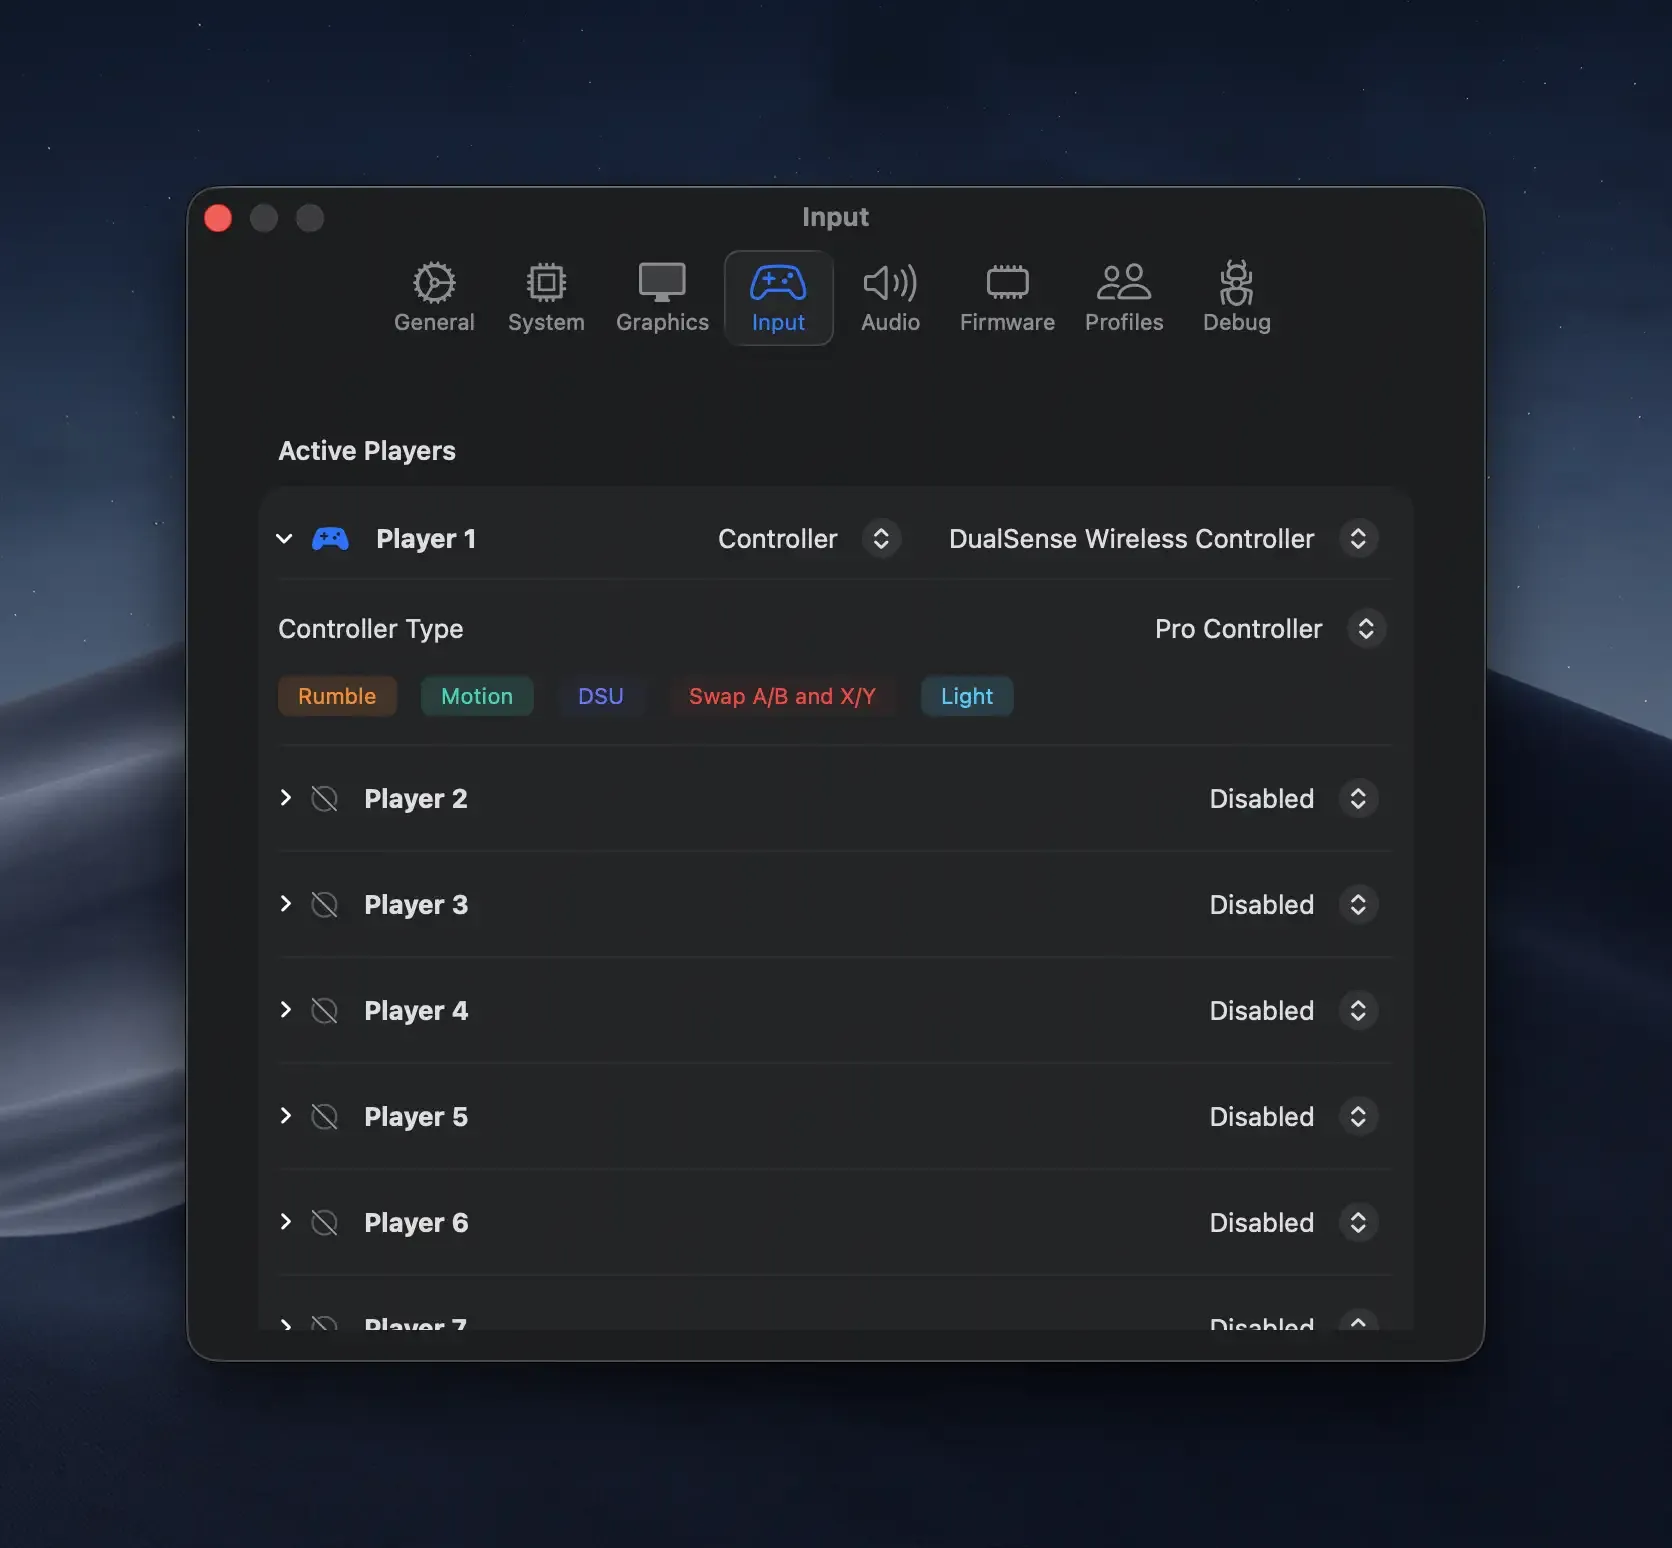
And that’s it. You can return to your library and start the game.
By default, it’s locked to 60Hz, but you can just disable VSync by clicking this VSync button down here.
Alternatively, you can head into Astris’s settings once more, then System, then disable Emulated VSync.
Keep in mind that in some games, the game speed is tied to the frame rate, so frame rates above default may make the game unplayably fast—this does not apply to KOTOR, though.
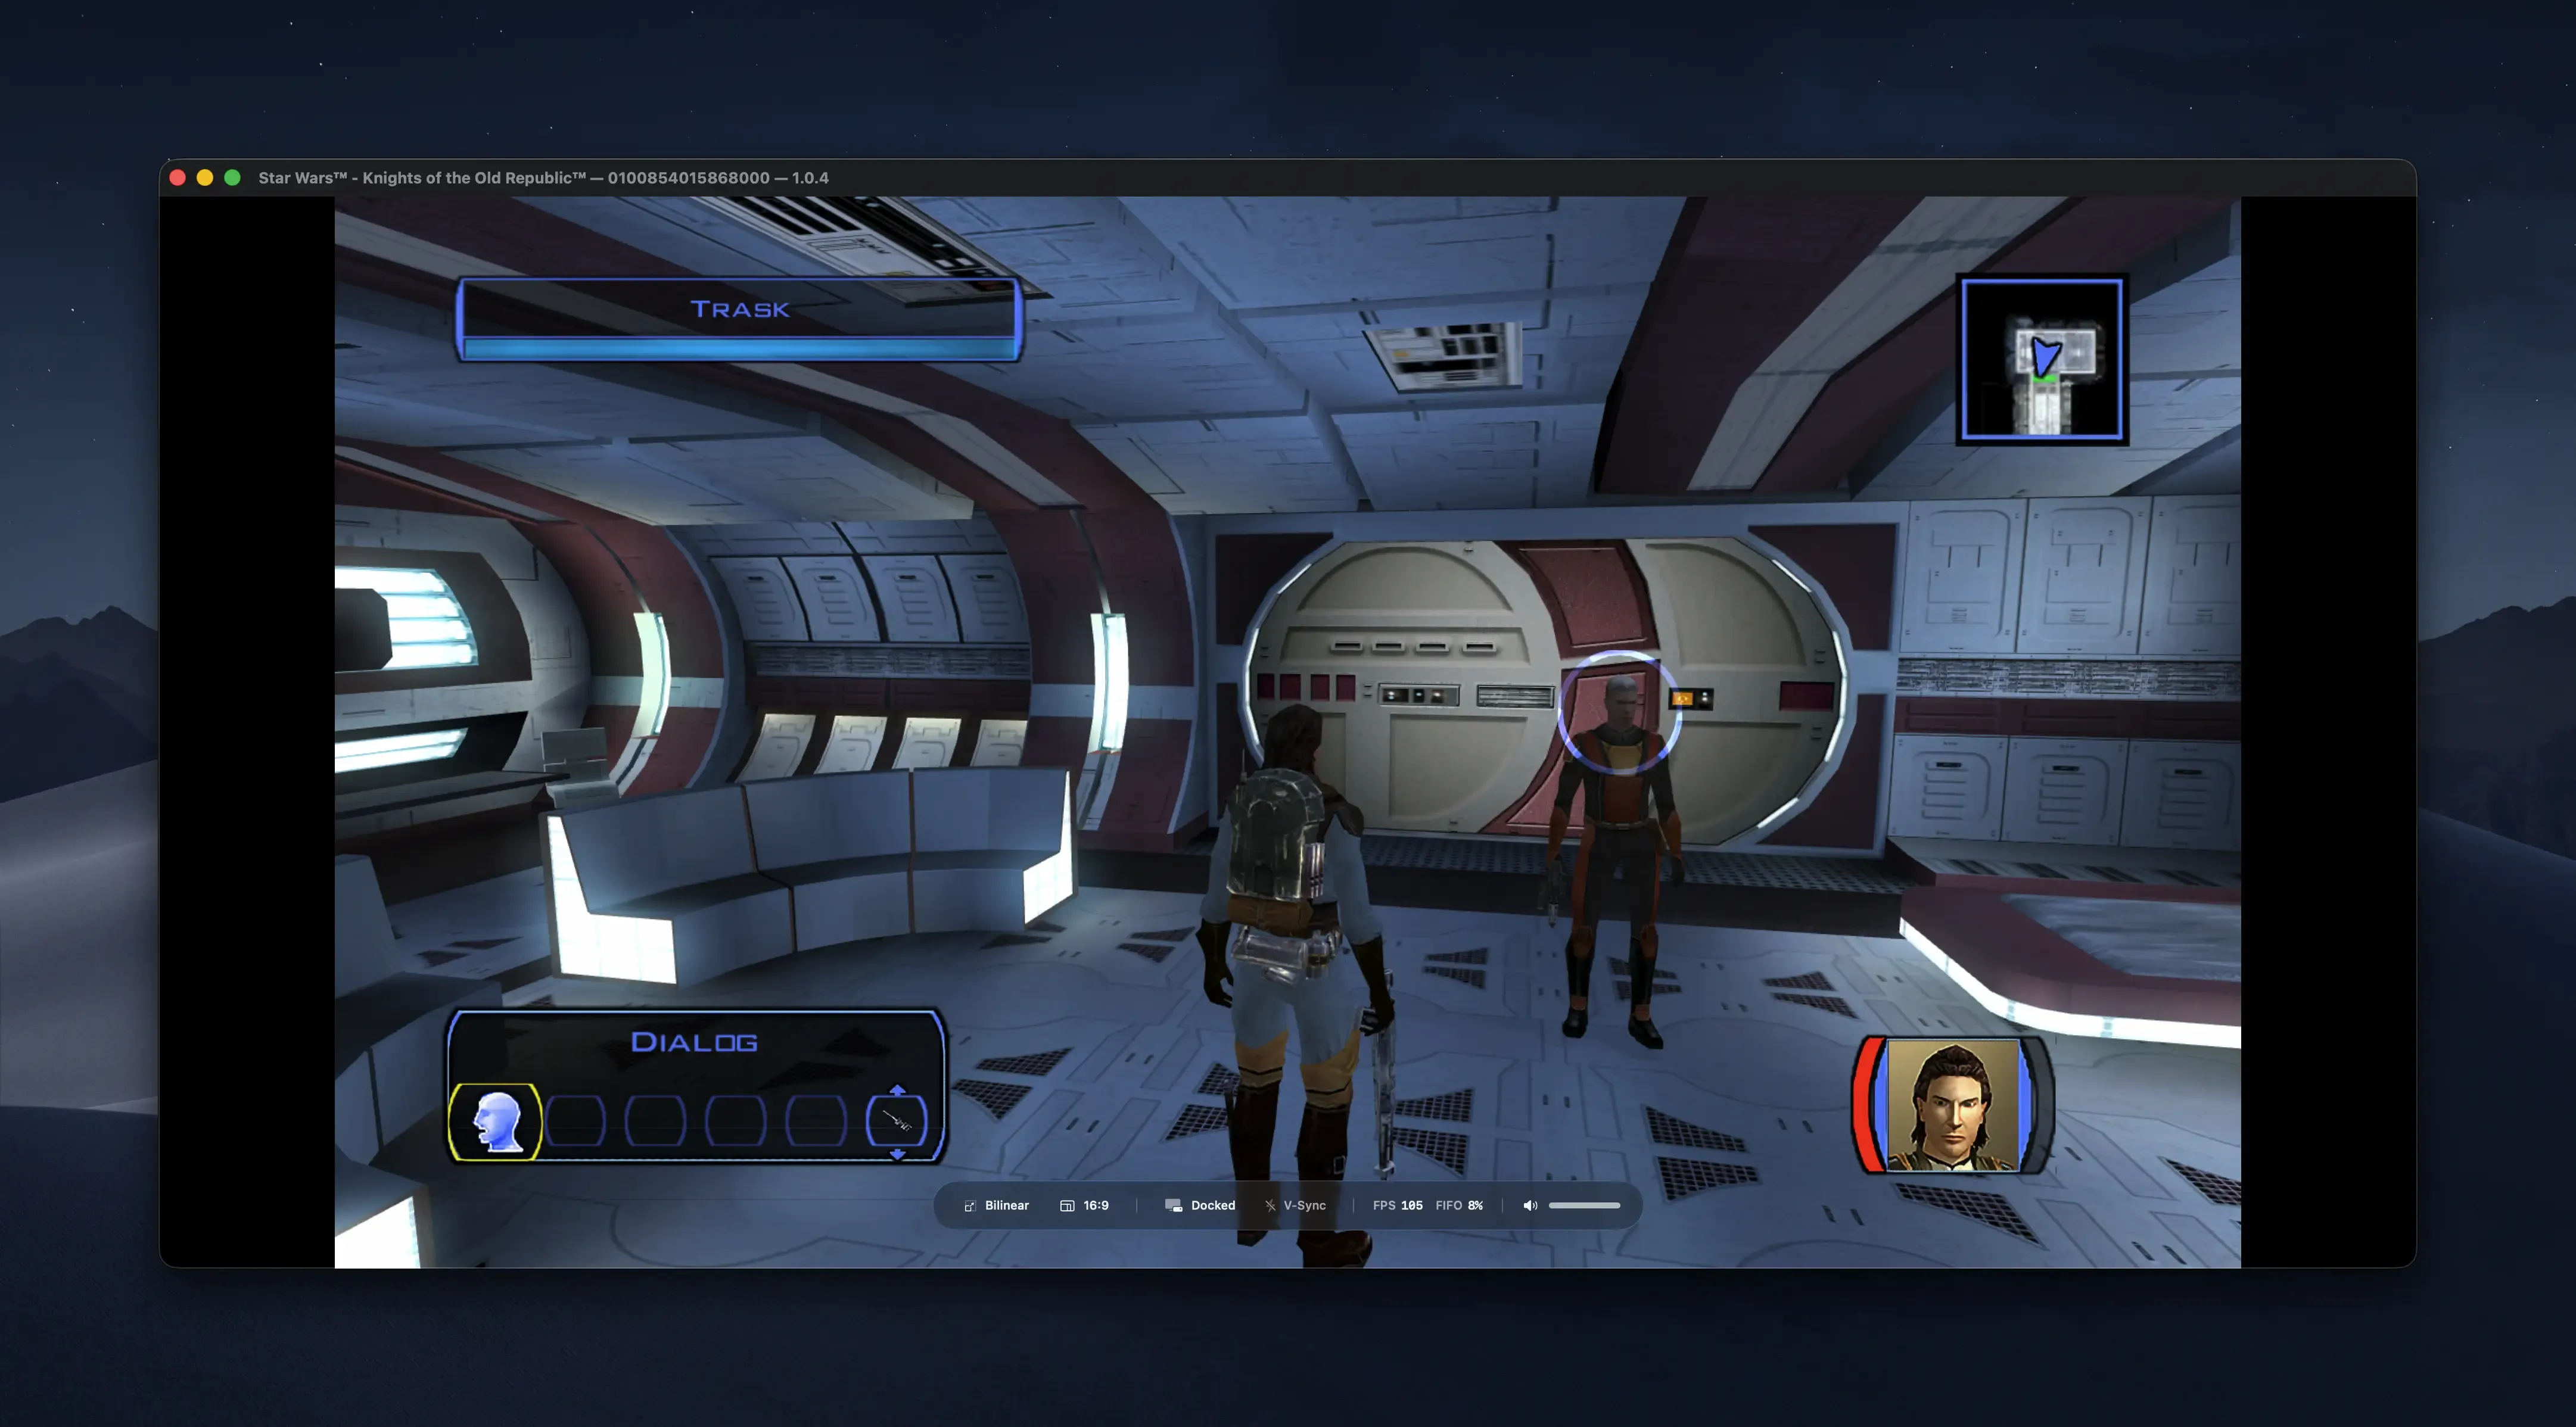
With macOS and Switch emulation taken care of, let’s tackle the final option for running KOTOR on your Mac: Windows!
Windows
Finally, we can take a look at Windows, and probably the best way to run the game on a Mac, albeit with some heavy lifting on our part required before we can get to it. There are several different ways to run Windows games on a Mac, including virtual machines, translation layers, such as CrossOver or PortingKit, or Bootcamp, allowing us to run Windows on bare metal—at least on Macs with Intel chipsets.
If you’re going the Bootcamp route, simply follow this tutorial on how to set it up, then follow this guide to set up the widescreen patch and more.
For people on Apple Silicon Macs, let me make a couple of suggestions. Since KOTOR is a DirectX 9 game, neither CrossOver, nor PortingKit will be able to offer good performance out of the box. Instead, we need to either run the game on virtual machines, or use workarounds to make DX9 games playable on a Mac. Given that virtual machines don’t offer the same performance as solutions like CrossOver or PortingKit, require more time and effort to get up and running, and consume much more of your precious disk space, I’ve opted for CrossOver, a piece of software developed by Codeweavers, who are responsible for Proton on Linux. It is basically the de-facto way of playing Windows games on Apple Silicon Macs, and despite it being a paid software, I still recommend you go for it. First of all, it has a 14-day trial, so you can easily try it out and, if you truly want to commit to gaming on a Mac, you may as well grab a perpetual license for as low as $40, whenever it’s on sale. Secondly, you won’t need CrossOver for anything besides installing the game, installing some mods, and applying the widescreen patch anyways—we will be using Wine to run the game itself.
So why don’t we start off by getting everything set up on the software side of things?
Installing CrossOver
Head over to the CrossOver website and grab the 14-day trial.
You need to enter your name and email, but masked email addresses are fine, so no need to give them your email address.
Once that’s done, simply unpack the archive you just downloaded, then move the CrossOver app into your Applications folder.
Finally, launch it, and you’re good to go.
If we were to do more than just install a game, we would need to install some dependencies, worry about DLL overrides, but thankfully, we don’t have to do any of that.
If you got the Steam version of the game, simply install Steam.
To do that, simply search for the Steam crosstie using CrossOver’s UI. A crosstie bundles dependencies and useful fixes and patches together, making the install process that much easier.
Simply follow the on-screen instructions to get Steam installed.
Once done, open it up, log in, then download the game from Steam.
Alternatively, you may be using the GOG version of the game.
While you could go ahead and install GOG Galaxy via CrossOver, you may as well just grab the offline installers for KOTOR off GOG’s website.
Once done, open CrossOver and click on the Install button.
Next, click on Install an unlisted application in the top right corner. There is a crosstie available for KOTOR, but it’s not useful for us in any way.
Once that’s done, you need to do two things: provide the installer, and choose a bottle to install the application into.
I won’t go over what a bottle is, but just think of it as an environment that your Windows applications can run in.
For the installer, choose the .exe file from GOG you just downloaded, and for the bottle, create a new Windows 10 bottle and name it whatever you like.
Click Next and let the installer do its thing.
Once your copy of KOTOR is installed, we can focus on installing mods.
Installing mods
The installation process is almost the same as for the Mac version of the game, which you can reference here.
The only real difference is that the Windows version won’t require you to click Show Package Contents—you can just browse to your installation, then find the Override folder inside the root of your game folder.
Apart from that, the installation process is identical to what I showcased in the section linked above.
Widescreen!
Unlike the Switch version, the Windows version does not come with native widescreen support, but unlike the macOS version, we can fix that by applying an unofficial widescreen patch. There are two options we could choose from: Flawless Widescreen, or UniWS.
Flawless Widescreen injects a patch during runtime, whereas UniWS alters game files permanently. On actual Windows hardware, both are viable options, but for us, UniWS is the better solution, saving us from running yet another background process. To get everything set up, simply follow the instructions below:
- Create a backup of your original
swkotor.exe, which can be found in the root of your game’s installation folder. Next, download a hex-editable version of the executable, then replace the original.exewith the modified version. This step is mandatory, as otherwise, UniWS won’t be able to apply the widescreen patch. - If you haven’t done so already, download UniWS from here.
Run
uniws.exevia CrossOver by opening the app, clicking onRun Command, then clicking onBrowse, then selectinguniws.exe. Once that’s done, the path next toCommand:will be populated with the path touniws.exe. Feel free to clickSave Command as a Launcher, to get easy access to UniWS at any time. Then, click onRun. - Select
Star Wars: KOTOR (1024x768 interface)in the dropdown menu, then browse to your KOTOR installation folder. Select your desired game resolution—I’ll go with 1920x1080—and click onPatch. - Browse to your game installation folder, then open
swkotor.iniwith a text/code editor of your choice—I’m using VSCode, for example. Find the[Graphics Options]section. ChangeHeight=andWidth=to the same resolution you selected in UniWS. If neither of these entries exists, simply add them under[Graphics Options]. In my case, I would end up with:ini[Graphics Options] Width=1920 Height=1080 - Optionally, install high resolution menus by copying the files from the folder named after your chosen resolution—
gui.1920x1080in my case—into your game’sOverridefolder. If you do so, you may also want to check out this font mod, as otherwise, text could be hard to read. Finally, copy bothhires_patcher.batandhires_patcher.exeinto your KOTOR installation folder, then runhires_patcher.batusing CrossOver. You’ll be prompted for the desired resolution once more.
Running KOTOR
Finally, we can run KOTOR. This section originally contained detailed instructions on how to run the game through Wine. I have since written a dedicated article about running any DX9 game on Apple Silicon, so instead, reference that article to run the game.